
I call this one Sophie Forever because I spent forever on this image. I retouch on average approximately 3-5 hours on each image that I post. Yes, I know. I'm slow. On this image, I've spent approximately 8 hours on it. Lots of time was lost when I masked a layer that had both dodging and burning and then a blur. I basically lost 1 hour of work and then had to redo it, all the while kicking myself in the ass for not being more diligent about separation the adjustments. Here are my notes though:
This image is unique because it has a fine layer of noise added to it. I've found that my recent images were coming out a little too "smooth". This is a function of both the output resolution as well as the processing that these pictures go through. So in order to make them more "lifelike" I've applied a small amount of grain to it (1%).
This image also has a fair amount of sharpening added to it. I rarely sharpen my images, but this one has approximately 65% of unsharp mask applied which while seemingly a lot, did not alter the image too much. At 12 megapixels, I guess you really have to push the unsharp mask before it starts to disintegrate and show artifacts.
I'm not exactly sure why I decided to process this image the way that I did, but I didn't adhere to my step-by-step retouching this time. The bad news is that I made a mistake that cost me about an hours worth of work. The good news is that I was more comfortable with the image and final product and moved from blemish-removal to D&B to blur, all seamlessly. I basically applied the changes that I felt were necessary at the time and didn't do anything in any particular order. Just whatever was necessary in my opinion at that particular moment. Needless to say, I'm getting quite comfortable in PS.
In Lr, I made some color adjustments. I did the usual desaturation of oranges to get the skin to a closer shade of "silver". Then I adjusted the reds and the luminance. I actually played around the with blues because the eyes and hair had a tint of blue from the color temperature of the image. That allowed me to highlight the hair (and whites of eyes) even more.
Lastly, I added a touch of clarity, vignetting, and that's about it. I only do whatever feels like is necessary. So this image really was a culmination of "what do/don't I need". There's no real formula. Sure there's a lot of stuff that I usually do but I kind of go through and apply only what I feel is necessary. I did spend a lot of time removing the blemishes in multiple layers. This is no longer just a healing brush technique but a healing brush plus dodge/burn and then some more healing brush. The problem is that the blemishes are not limited to just small spots but sometimes entire highlights and shadows that need to be adjusted and then re-smoothed out. Hence the technique. I'm sure I'm not the first one to do this although I didn't learn it from anyone.
Another thing to note is that I "crunched" the whites in my levels (PS) adjustment. The image was probably slightly underexposed but more importantly did not contain much information that registered towards the end of the histogram. For that reason I brought the end of the histogram in to about 217 (or less). That compressed the tonal range of the image but (seemingly)increased the tonal range of the face.
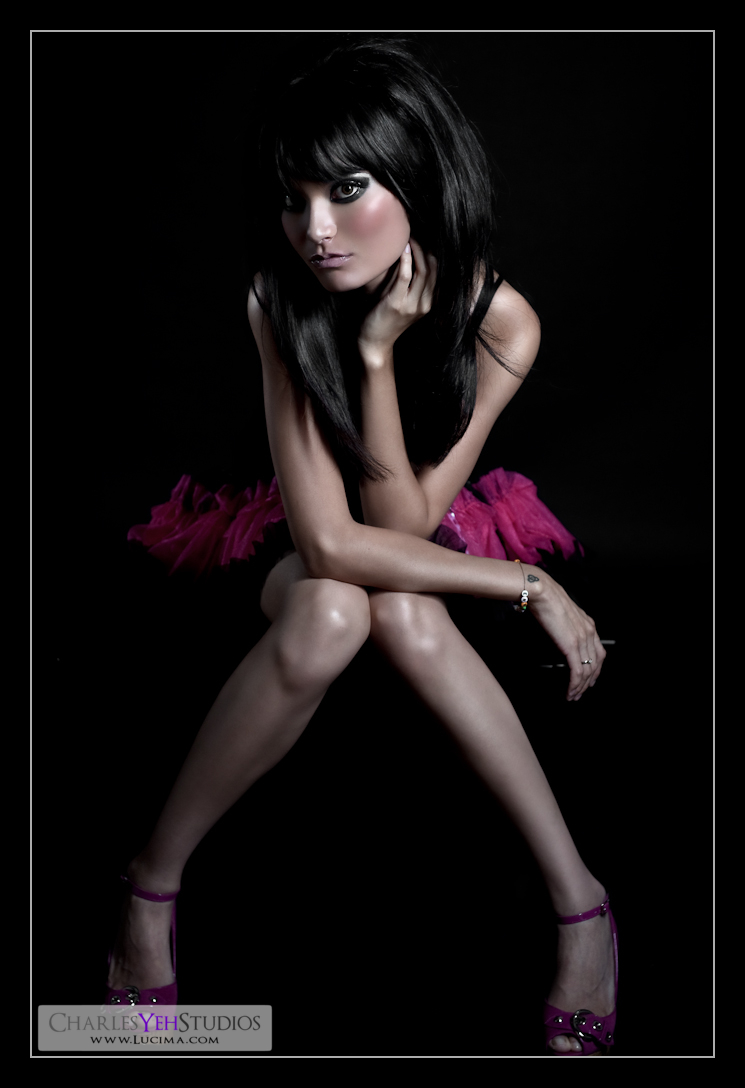
Strobist info: I dedicate less and less time to the strobist information because it's no longer the pivot point of my work. Retouching is for me at least for now, the focus. The lighting facilitates the end product which has always for this picture been about punch and dramatic lighting. This set was also very "dynamically lit" which for me means, I don't remember what the lighting setup was exactly, because we were constantly moving lights and/or adding lights. The funny thing is that as I type this sometimes I have to go back and reexamine the original image and backsolve the lighting. This usually means zooming in on the eyes to see the reflections of at least the main lights. The rest of it is just by memory.
The main light is an AB800 in a 42" Apollo Westcott softbox from upper camera right. There is a rim light coming from camera front left of Sophie. You can see the camera left rim light on Sophie's arm. Later on I placed a camera front right rim light for balance but I don't think it was present in this shot. There's no hairlight and there's no fill light to my recollection. If there was a fill light, it would have been a silver reflector placed to the left of the camera. Whether or not it's there is doesn't matter too much since it doesn't provide much if any added exposure to the left of her body and face. Triggered by Gadget Infinity Cactus V4.
Camera info: D3, 24-70mm f/2.8G, 1/200th, f/3.5, 70mm, ISO200.
Model/Wardrobe: Sophie Marquez
Makeup: Alyssa Fong
No comments:
Post a Comment