
There's something powerful and compelling about B&W images that I will seek to reproduce. Perhaps it's that the greats didn't have color and even when they did have color opted to shoot in B&W. Black and white can simplify yet create a depth in an image that ordinarily can not be expressed in color.
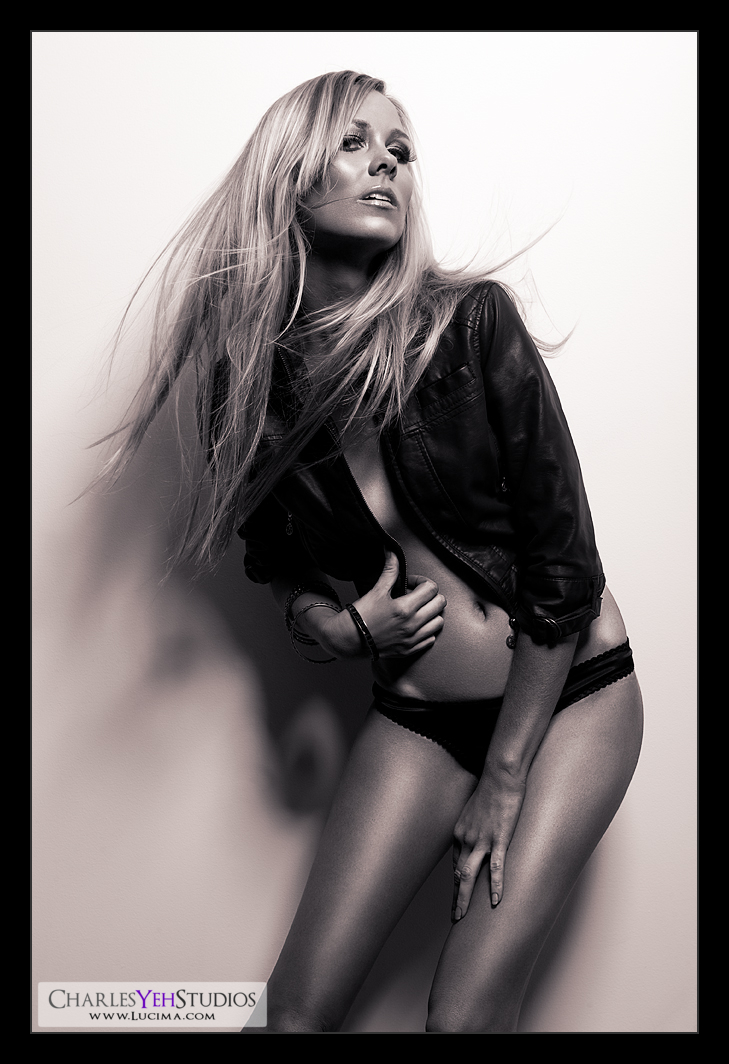
So every now and then I come back to B&W. This time I return to B&W with a slight gradient map that is reminiscent of a sepia tone. The gradient map is Violet, Orange overlayed (blending) at 10% (opacity). I could have stuck with a pure B&W image but I've been obsessed with gradient maps lately so why the hell not?
Aside from the actual image, I post-processed this with 5 layers. Color balance, levels, B&W, and 2 gradient maps.
The first 3 are straight-forward. The only thing particular was that with the B&W adjustment layer I turned down both the red and yellow channels to create a darker tone for contrast against the white wall.
The 2 gradient maps were used differently from one another. The first was B&W gradient map luminosity blended at 66% opacity. The second gradient map was the sepia-ish tone overlayed at 10%. Essentially the B&W gradient map was simply for contrast and to create more punch with the B&W tones, which is why I only needed it for luminosity. The second gradient map was for the tint.
Final processing included sharpening andadding a touch of noise back to the legs and abs. It's an illusion really to give the skin just a little more texture in an attempt to make the image jump off your display.
edit: After typing the above I got distracted and started googling "retouching skin texture". It occurred to me to try high-pass so I went back and experimented with high-pass output to bring out skin texture. I"ll most likely dedicate a post specifically to this later...
Anyway, as I was saying. Sharpening, noise, etc. are all techniques to bring back texture to the skin and give it a lifelike if not 3-dimensional quality that allows it to "pop". You've heard me say this before but I've always been seeking new methods of making my images "crisp" and sharp. Learning new techniques brings me closer to being satisfied with the image even though we all know there's no way I can be truly satisfied with any one image for more than a day... I'm not easily impressed and when I am impressed, that feeling never lasts for long.
So here you go. The latest rendition of Kendall with some of the most detailed skin textures that I've ever produced in an image.
Camera: D3/24-70mm f/2.8G @62mm, f/9.0, 1/200th, ISO200
Strobist: Single AB800 in 22" beauty dish from camera upper right
Model: Kendall B.
Makeup: Kelli Zehnder
Wardrobe: Kendall/Michelle Green
So every now and then I come back to B&W. This time I return to B&W with a slight gradient map that is reminiscent of a sepia tone. The gradient map is Violet, Orange overlayed (blending) at 10% (opacity). I could have stuck with a pure B&W image but I've been obsessed with gradient maps lately so why the hell not?
Aside from the actual image, I post-processed this with 5 layers. Color balance, levels, B&W, and 2 gradient maps.
The first 3 are straight-forward. The only thing particular was that with the B&W adjustment layer I turned down both the red and yellow channels to create a darker tone for contrast against the white wall.
The 2 gradient maps were used differently from one another. The first was B&W gradient map luminosity blended at 66% opacity. The second gradient map was the sepia-ish tone overlayed at 10%. Essentially the B&W gradient map was simply for contrast and to create more punch with the B&W tones, which is why I only needed it for luminosity. The second gradient map was for the tint.
Final processing included sharpening and
edit: After typing the above I got distracted and started googling "retouching skin texture". It occurred to me to try high-pass so I went back and experimented with high-pass output to bring out skin texture. I"ll most likely dedicate a post specifically to this later...
Anyway, as I was saying. Sharpening, noise, etc. are all techniques to bring back texture to the skin and give it a lifelike if not 3-dimensional quality that allows it to "pop". You've heard me say this before but I've always been seeking new methods of making my images "crisp" and sharp. Learning new techniques brings me closer to being satisfied with the image even though we all know there's no way I can be truly satisfied with any one image for more than a day... I'm not easily impressed and when I am impressed, that feeling never lasts for long.
So here you go. The latest rendition of Kendall with some of the most detailed skin textures that I've ever produced in an image.
Camera: D3/24-70mm f/2.8G @62mm, f/9.0, 1/200th, ISO200
Strobist: Single AB800 in 22" beauty dish from camera upper right
Model: Kendall B.
Makeup: Kelli Zehnder
Wardrobe: Kendall/Michelle Green
outstanding! read Bart's post on B&W conversion.
ReplyDeletei like how you converted it... mostly.